Help! I don't know how to eat anymore!

Help! I don't know how to eat anymore!

Tuesday, November 23, 2010

Chocolate, Raspberry, and Banana Dessert Pizza


Ever since the time change, my urge to hole up in my freshly-painted kitchen with fresh ingredients has grown strong. My urge to devour desserts, however, has been around a lot longer. This past weekend my friends and I held our fifth annual Fakesgiving, a Thanksgiving for friends where everyone brings a dish they're good at making and some booze and we revel in each others' company.


The tradition started one year after my mother was killed. I was living in San Francisco with one of my good friends and I was having a hard time dealing with the one year anniversary of my mom's death. My friend contacted another good friend at home and they arranged to have a bunch of my friends show up in SF for our own Thanksgiving so I would know how loved I was. 


We have managed to keep the tradition alive and well, topping ourselves every year (prom dresss, raw turkey, boys and girls switching clothes, and so on). Fakesgiving does not require Thanksgiving foods, just people bringing whatever they are good at making and booze and everyone enjoying each other's company. We basically celebrate how much we all like each other in a party fashion. 


The fifth annual Fakesgiving was held this past Saturday and it was absolutely magical. Our small town received a very large beating early Saturday evening from Alaska and we got almost a foot of snow. We lost power a few hours later until 6am the next day, so we spent a fun evening playing outside (the boys threw snowballs at each other from off the roof) with both fireplaces blazing inside the house and games and coodling by candlelight.


There is still snow on the ground outside and it's been getting dark extremely early and it's cold. Naturally, this puts me in the mood for comfort food and what's more comforting than dessert? This recipe was inspired by two things: the Hot Italian Zucchero Pizza and the confused checkout guy at my local health food store.


When I was buying my second package of gluten-free pizza crust mix after my first two epic failures, I also grabbed a bar of Chocolove Rasberries in Dark Chocolate (my favorite chocolate to carry around for sweettooth emergencies). The checkout guy asked me if I was going to put the chocolate into the dough and I looked at him confused. I told him the purchases were for separate purposes, though I flashed on that out-of-control-delicious dessert pizza I'd had at Hot Italian and began to formulate an idea.


I knew I would have leftover dough after making the Arugula and WhiteFresh Mozzarella with Arugula and White Truffle Oil Pizza so I decided to make a dessert pizza using the raspberry chocolate. The result was so delicious that my sister asked me to make three more so she could eat them for every meal. 


Chocolate, Raspberry, and Banana Dessert Pizza
1/2 package Bob's Red Mill Pizza Crust mix (to make one pizza, use the whole package to make 2)
1/2 cup powdered sugar
3 bars Chocolove Raspberries in Dark Chocolate
1 package fresh raspberries
2 bananas
a little extra powdered sugar


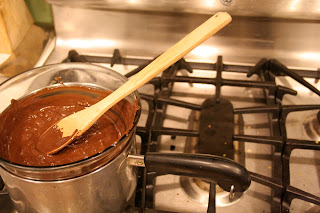
Make the pizza dough according to directions on the package. When dough is finished kneed in 1/2 cup powdered sugar. Sprinkle some powdered sugar on a pizza stone or pizza sheet so the dough doesn't stick and roll or kneed into whatever shape you want (I chose a heart because I heart dessert). Sprinkle with powdered sugar and bake the dough for about 20 minutes or until golden brown. While the dough is baking, melt chocolate on the stove in a double boiler. You can create a makeshift double boiler by placing a glass bowl on top of a pan of boiling water that is larger than the pan. Once the dough is done slather on chocolate and add fresh raspberries and sliced bananas. Drizzle any remaining chocolate over the top of the fruit and dust with powdered sugar. 


Bon appetit...just not wheat!

Monday, November 15, 2010

Learning Patience for Pizza


I suppose all good chefs have bad days and dishes that flop. People who are mediocre chefs, like myself, have a lot of these. Does this look like pizza dough to you?


Hint: it is not. This is watery failure number 2.

I bought an all-purpose gluten-free flour mix that claimed it could be used to make pizza dough. It claimed you could substitute it cup for cup for regular flour. It made lots of claims. What I did not see because my sister threw away the bag before I could read it was that it claimed you would need some xanthan gum for said substitutions. Luckily for me I did not figure this out until I'd made two attempts on two different days and used up all my expensive flour and driven to the store to buy more and then read the package to see what I had missed. Then I saw that xanthan gum was $10 a package and I just broke down and bought a gluten-free pizza crust mix.


This was so much easier. I ditched the bread machine and made it by Kitchenaid and everything went according to plan. All I had to add to the mix was eggs and oil and water. Simple. Bob's Red Mill mixes and flours and grains come in several varieties and I've been able to find them at both my local health food store and our bigger grocery stores. I've also heard great reviews of Pamela's Products which I will have to test out soon.


Fun fact: the eggs I used to make this pizza crust were from my own home-grown free-range happily quacking ducks.

A few weeks ago I was perusing the deals at Grocery Outlet and found a small bottle of white truffle oil for $2. I've never tasted or used truffle oil but people are always raving about it, specifically on food TV, so I thought it would be a fun challenge. I snatched up a bottle and began devising a plan.


There is a fantastic restaurant in Midtown Sacramento just blocks from my best friend's apartment called Hot Italian that I have cheated with wheat in on several occasions. They serve up pizzas piled high with lots of fresh greens and I've been meaning to attempt a recreation at home that wouldn't offend my intolerant tummy. I settled on a fresh mozzarella with arugula and truffle oil pizza. I smothered the finished product with parmesan and red pepper flakes and poured a nice glass of red wine and was a very happy girl.


Fresh Mozzarella with Arugula and White Truffle Oil Pizza
1 package gluten-free pizza crust, prepared according to directions (Pamela'sBob's Red Mill, etc...the Bob's mix made two crusts but I was only eating for one so I saved the other ball of dough in the fridge)
1/3 can organic pizza sauce
fresh mozzarella, sliced (I used about 8 thick slices, vary it depending on your love of cheese)
1/2 bunch arugula

white truffle oil


I slathered a thick layer of pizza sauce on the crust and strategically placed the mozzarella so that when it melted it would cover everything. I put the pizza in for about 16 minutes, then turned on the broiler for 3 minutes so the cheese would get all nice and crispy brown.


While the pizza was cooking, I washed the arugula and broke off some of the longer stems (aside from broccoli, I hate the stems of greens). I threw the arugula in a bowl and drizzled truffle oil all over it, tossing the greens around so they were all coated. When the pizza came out I threw the arugula on top and devoured almost the entire thing. So yummy and it reminded me of the trip to Italy I took in January.


I have big plans for the remaining ball of dough in my fridge to become a delicious dessert pizza. My dream is to involve a raspberry chocolate thanks to a misunderstanding with the health food checkout counter guy. Stay tuned!


Bon appetit...just not wheat!

Wednesday, November 10, 2010

The Perfect Pumpkin Curry

Why, hello there! Been a while...or half a year. Whatever.

In the last few months that I'm sure you've been missing me, a lot of non-culinary stuff has gone on. It's not my fault. Summer is too warm to cook much in the Sierra Foothills and our stucco house likes to hold in the heat. I've been busy and frequenting several of the same restaurant establishments to the point where I barely have to order anymore, they just know.

BUT, the fall colors have arrived and it's getting dark extremely early and I'm ready to hole up in my kitchen and COOK. When I was in San Diego last month, my good friend over at Jack Bauer Will Save Us All had a cornucopia of different festive fall gourds and squashes on her countertop. I'd always been somewhat jealous of people who take the time and have the energy to decorate for every holiday and every season.

I was jealous of her gourds.

When I got home and started putting my house together for an extremely non-festive Halloween party, I realized something was missing. I went shopping for party snacks and there they were: gourds and squashes galore. I grabbed the most colorful and lumpy kinds along with a very small pumpkin and when I got home, I arranged them festively in a bowl on my kitchen table. A dream come true!

So Halloween was 10 days ago. I've been eyeing said gourds and squashes and reminding myself I need to actually do something with them, not to mention the two large uncarved pumpkins on my front porch, before they all start attracting flies and have to go out to the chickens. A few days ago, I flashed on this fantastic pumpkin curry I'd had when I was out to Thai food with my other good friend over at Gather Jewelry (her jewelry is FANTASTIC, go buy some). All the pieces of this gourd dream were finally falling into place.

I found a recipe at NibbleDish that had been adapted from a pumpkin curry dish at a Thai restaurant in Reno. I, in turn, adapted it to fulfill my taste buds and let me say they were absolutely singing. I scraped my bowl clean and barely came up for air. Then I had seconds. I will be making this in a much larger quantity with my two giant pumpkins and freezing it so I can enjoy it all winter. The best things about this recipe are that it doesn't take anything fancy and it doesn't take a lot of time. Did I mention it's fabulous?

The Perfect Pumpkin Curry
1/2 small pumpkin seeded, peeled, and cubed
1 can lite coconut milk
1/2 cup of water
3/4 low-sodium chicken/vegetable stock
3 tbsp of red curry paste
3 tbsp of fish sauce
1 tsp ground ginger
1 cup onion, chopped into large pieces
1/2 red bell pepper, julienned
2 large carrots, chopped


Brown Basmati Rice (cook in a rice cooker or right on the stove)
1 1/2 cup water
3/4 cup brown basmati rice
1 tbsp oil
1 tsp ground ginger
1 tsp cumin
1 tsp onion powder
1 tbsp butter


Put cubed and peeled pumpkin in a bowl and drizzle with olive oil and salt and pepper. Spread pumpkin on a cookie sheet and broil on high until pumpkin is golden brown. Combine coconut milk, water, chicken stock, fish sauce, curry paste, and ground ginger in a pot and bring to a boil. Reduce the heat and add bell pepper, onion, carrots, and roasted pumpkin. Simmer on medium until carrots are soft, stirring occasionally. Ladle over brown basmati rice and enjoy. 

Feeds three, two if your hunger level is high.


Bon appetit, just not wheat!

Friday, July 23, 2010

Book my face!

WhoWhat Wheat is now on Facebook, befriend me and eat wheat free!

Creamy Fresh Corn and Mascarpone Cheese Polenta


I have a few very distinct memories of my sister and I when we were little being forced to eat polenta. It was never the delicious cream-of-wheat-ish stuff I have these days, it was somewhat hard rounds of inedible sick that I assume came from something like this:


Appetizing, eh? When I asked her about it today, her response was, "I thought that was one of the worst foods ever thought up ever."
Our mom was a fairly decent cook, not extremely inventive but she could cook. It was always horrifying when we heard she was making polenta because we knew we wouldn't be allowed to leave the table until we ate some. It was so dry and rubbery that it was vomit-inducing to chew up so we always swallowed our mandatory bites whole. I remember whining a lot, "how many morrrrrrrrrrrrre?"

It was just last year that I rediscovered polenta, finally getting over my childhood anger and trying it again. There is a restaurant in town that makes a fabulous baked polenta appetizer and after spending a bit of money ordering that several times, I decided to try it on my own.


I knew I could make it on the stove but heard it took 45 minutes and when you've cut your gym session short because you've been thinking about food the whole time because all they play on their TVs is The Food Network and your stomach will eat itself if you don't eat soon, who has time to stand for 45 minutes stirring? Not I. I don't even like to make it all that much when I do have the time because it needs such constant babying.

However, I have discovered the secret. My good friend Karen gets all the credit for introducing this to me, but she gave me permission to post it because she's not quite internet savvy. She and her husband had a few friends over for an impromptu BBQ potluck last weekend and she made this along with Grilled Mustard Chicken and I've been dreaming of polenta ever since.


While I've bought tube polenta and sliced and fried it, I never knew you could mush it up in a pan with some kind of thickener (butter, milk, cheese) and make it taste exactly like the time consuming corn meal. Karen proved me wrong, and in the most delicious way possible. Enjoy the heck out of this, I made it last night for two friends and we definitely enjoyed it all the way through the end of the pot. I've omitted the sugar the original called for, as well as half the mascarpone cheese, and used tube polenta rather than corn meal.


Creamy Fresh Corn and Mascarpone Cheese Polenta
1 tube original polenta
dash of salt and pepper
1 ear of freshly pre-cooked corn
about 1/4 mascarpone cheese

Throw an ear of corn still in the husk and wrapped in foil onto the BBQ. I've heard you can forgo the foil if you just soak the corn in water for 10 minutes, but I don't like soaking veggies in water as they get very watery. So, foil. Cook for about 15 minutes on medium-high heat and then flip over for another 15. Remove foil and husks, and cut kernels off the cob. Set aside.


Cut tube polenta into cubes and throw in a pot over medium heat. Mash with some kind of instrument (I used a wooden potato masher/pestle), add salt and pepper, mascarpone cheese, and corn. Cook until everything looks blended and creamy and remove from heat. The nice thing about tube polenta is it's precooked, so all you're basically doing is warming it. 

This served three, though reluctantly. We all wanted a lot more than we got, so I'd say this serves two and you should double the recipe if you add more people. We ate the polenta with some grilled Aidells Cajun Style Andouille sausages and a simple spinach salad with pomegranate dressing. FanTAStic, not too filling, and easy.


Bon Appetit...just not wheat!

Summery Chipotle Tequila Shrimp Tacos


How many is too many Panda licorice sticks in one sitting? Because I'm stuck in a cubicle and just snarfed down three of them and might have a problem.


One of the reasons I started this blog was because I was in a food rut (perhaps I still am...see above). My diet consisted of mostly yogurt and fruit and Mexican food and I felt like that might not be the healthiest way to live. Mexican food is the easiest thing for me to fall back on because I always have taco or quesadilla ingredients and pretty much everything but flour tortillas is wheat-free. Hence, our house has approximately this many corn tortillas on hand at all times:


I tried to lay off for a while, but the craving came back hard this time and I decided to try and switch it up. I was at the gym thinking about how hungry I was and how I didn't want to cook anything that would take forever because I was getting close to that my-stomach-is-eating-itself stage that I've mentioned before. I knew I had a ton of shrimp and black beans and taco junk so I began brainstorming.


Some of my fabulous sitting-in-the-pool friends had left me a plastic Parmesan container full of tequila, the lovely people that they are, so somehow that had to come into the mix. There was also a container full of chipotle chillies that looked oddly suspicious to anyone who didn't know what they were so those needed to go as well. I bought some creme fraische and the meal was born.


I also had the pleasure of feeding this to one of my good friends, and she had some feedback for you:
"mmmmmmm!"
She said they were nice and light yet filling, spicy but not too spicy, and a perfect summer meal. We each scraped every bowl and plate clean of everything we made and I will be making these again.

And hey, fun news. Who What Wheat just got it's first non-person-i-know-or-am-friends-with-or-related-to follower! Welcome, apparently I'm doing something right.


Summery Chipotle Tequila Shrimp Tacos
1 tsp chili powder
1/2 lime (the original recipe wanted sugar..no thanks, lime does the job and tastes WAY better)
Dash of salt
1/4 tsp ground cumin
1 large chipotle chili (the kind that come in adobo sauce), chopped
1 Tbsp adobo sauce
2 Tbsp tequila
about 1 pound frozen shrimp (this can be adjusted based on what kind of shrimp you use and how big they are...frozen was all I had and the extra water made for a delicious sauce for them to simmer in)
1 tsp olive oil
6 6-inch corn tortillas
2 cups shredded iceburg lettuce
1 avocado, sliced
salsa
creme fraische
guacamole (optional...some people don't like avo as much as I do and the slices plus guac could be too much)
1 can low sodium black beans
1/4 onion
2 cloves garlic, minced
Salt and pepper


Combine chili powder, lime, salt, ground cumin, chipotle chili, adobo sauce, and tequila in a bowl. Add shrimp and toss to coat. Heat oil in a nonstick skillet over medium-high heat and add shrimp.

Here's where things can vary a little. I used frozen shrimp, so my cooking time was much longer. Even though they were partially defrosted, they still let out a lot of water which combined with the tequila and lime and spices to make a nice sauce. I covered with a lid and let the shrimp simmer until the liquid had evaporated, leaving behind a kind of paste and giving them the ultimate spice kick with lots of flavor.
If you use fresh big fresh shrimp, your cooking time should only be about a minute and a half on each side. If you use small shrimp you can probably just stir them around the pan for a few minutes until they're all nice and pink.
You could also add about half a cup of water to the pan when using fresh shrimp if you want the simmer effect. Cooking is an imperfect science.


While the shrimp are cooking in whatever way you want them to, throw the black beans, chopped onion, minced garlic, and some salt and pepper into a pot and let it all simmer until the shrimp are done. The longer the better as the beans will take on a delicious flavor from the garlic and onion the more time they spend over the heat together.


Heat tortillas in the oven or a skillet for a few minutes until warm and soft and throw three on each of two plates. Add beans, shrimp, lettuce, avocado, salsa, guac, and creme fraische on top and oh my yum.

These shrimp are spicy, but with all the fresh cold toppings the heat gets subdued quite a bit. I never understood what they meant on cooking shows when they said the heat builds, but it definitely does with these bad boys. By the end of the second one you definitely want to keep eating because they aren't super filling but you kind of need to keep eating to keep the heat at bay. It's lovely.

Serves 2 if you can eat 3 tacos (which we did as these aren't extremely filling), 3 if you can't.


Bon Appetit...just not wheat!

Monday, July 19, 2010

Cherry Balsamic Chicken Thighs


I've never been a big fan of dark poultry meat and until a few months ago purchased exclusively skinless boneless chicken breasts to cook with. I guess you could call it a fear of change. However, a recent foray into bone-in breasts with adobo sauce and chipotle chilies shoved under the skin has opened me up a bit to take more risks.


This summer I have been absolutely obsessed with cherries, but that wasn't always the case. I spent a month one summer during college in Romania working at an infant orphanage for two weeks and then traveling the countryside for two weeks. It was an incredibly intense and emotional experience and not just because of the children. During our travels, we visited a farmer's market and were highly ecstatic at the thought of fresh produce after weeks of nothing but meat and bread and potatoes. We grabbed a bag and stuffed it full of plump red cherries and sat in the sun to enjoy. Half a bag later another girl in our group came walking by and when we offered her some she said she always had to bite them in half, remove the pit, then pop the whole thing in her mouth.


We discovered six squirmy little maggots in that cherry, and after picking through several others discovered they were all infested.

I have a picture of it somewhere but can't find it at the moment to scan in. I found the one above on the 'net but it's pretty close to what we saw. You get the idea. Sick.

Flash-forward to several years later and I am finally ingesting them again, though I closely inspect each one and discard any that aren't perfect or have a weird consistency. I've made up for lost time well, purchasing over a pound at a time and consuming most of them in one sitting. This happens more frequently than my wallet thinks it should, but there just isn't anything as satisfying as cherries. They're such a portable fruit and they don't drip all over you and also YUM.


After watching an episode of Top Chef where they made some kind of Cherry Ginger Cinnamon duck breast, I began scouring for a cherry ginger cinnamon chicken dish. Fun fact: that same episode inspired the Congratulatory Homemade Cinnamon Ginger Ice Cream, which is an absolutely perfect dessert to these Cherry Balsamic Chicken Thighs. I probably could have eaten two or three of these, but I restrained myself.


Cherry Balsamic Chicken Thighs
1/2 cup cherries (original recipe called for dried cherries, I used fresh and think it was much better though slightly less tart)
1 cup boiling water
1 Tbsp. brown sugar
2 tsp. chili powder
1 tsp. ground ginger
1 tsp. cinnamon
1/4 tsp. nutmeg
Salt and pepper to taste
4 boneless skinless chicken thighs (about 1.25 lbs)
2 tsp. canola oil
1 medium onion, thinly sliced
2/3 cup low-fat, low-sodium chicken broth
2 Tbsp. balsamic vinegar
2 tsp. light or reduced-sodium soy sauce
1 tsp. honey
1 Tbsp. water

Preheat oven to 350°F. In a heatproof bowl, pour boiling water over cherries and set aside. Combine the brown sugar, chili powder, ground ginger, cinnamon, nutmeg, salt, and pepper and rub mix on both sides of chicken thighs. Heat oil in a large nonstick skillet and saute chicken for about 4 minutes on each side over medium-high heat. Transfer chicken to a baking sheet and bake uncovered until cooked through, about 15-20 minutes. While that bakes, add onion to the drippings in the pan and sauté for about 4 minutes. Combine the broth, vinegar, soy sauce, and honey. Add to the skillet and cook for 1 minute. Drain the cherries from the water and add to the skillet.


At this point, the recipe I adapted this from called for 2 tsp. cornstarch to be mixed with 1 Tbsp. water and slowly added to the skillet. I try to stay away from cornstarch whenever possible and although I did use it, I don't think it was necessary at all. I would say just add the 1 Tbsp. water and cook for one minute, then turn off the heat and set aside until the chicken is finished.

Once chicken has finished baking, plop one or two thighs on a plate and slather with sauce. This goes really well with a simple green salad, some hot corn on the cob, or for a heavier meal try some fresh corn and mascarpone cheese polenta (recipe coming soon!). Serves 4 unless you ravage more than one thigh by yourself, which is entirely possible.


Bon appetit...just not wheat!